
This is the step by step for my Mega Laser Dub Baitfish and is how I do it. Other tiers may have slightly different methods to mine but this is how it works best for me. Hope you like it.
1.
Tie in some hackles and flash for the tail

2.
Begin tying in small clumps of Laser dub at 45 degrees across the hook shank, one on top and one on the bottom so that they cross over.

3. Push the clumps back towards the rear of the hook and tie them down as in the picture.

4.
Repeat this same process along the shank until you have just a tiny space left next to the hook eye, you will need this to tie in the last clumps of material but slightly differently. It should take around 5 or 6 clumps to fill the hook depending on the length of the shank and pattern of hook you use. I’ve used a Sakuma 410 here which is a wide gape with a medium shank.

5.
Once you have nearly filled the hook, tie in the last two clumps in line with the hook shank rather than at 45 degrees.
6.
By now you will have quite a bulky build up of material and the fly will look very scruffy ! Don’t worry we are going to trim this in the next stages and shape the fly to how we want 😉
So fold the last two ties back and bring the thread round to the front and form a small thread dam on the nose of the fly and then whip finish and seal the whipping with glue.
7.
Now it’s time to trim and shape the fly. Getting this right and achieving the shape you want will only come with practice so don’t be put off if it doesn’t go quite right to start with !
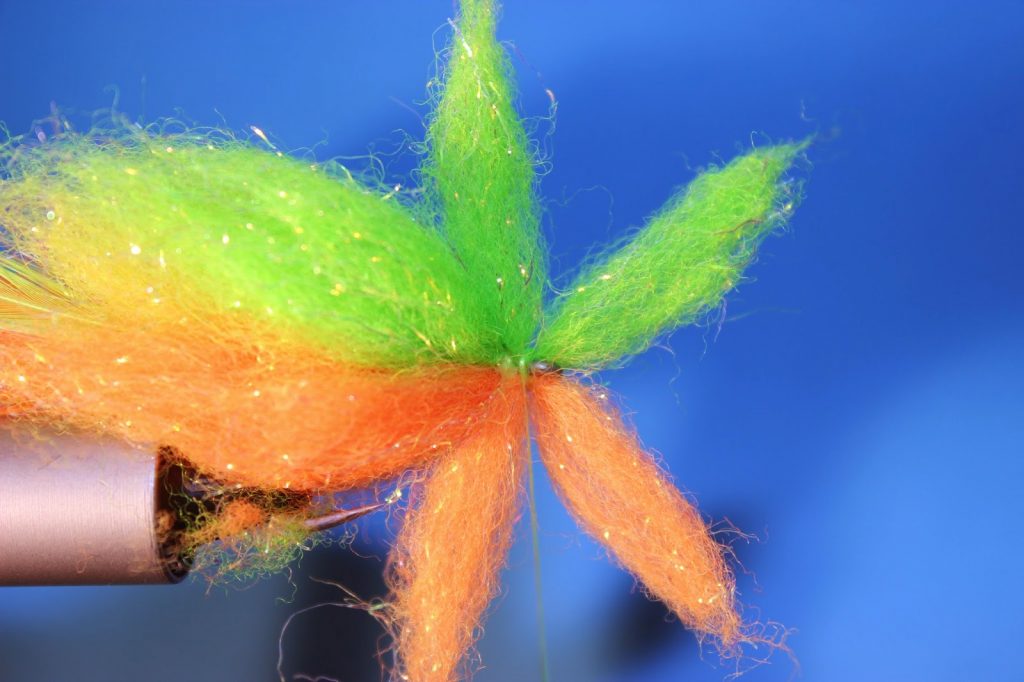
Give the fly a really good brush now, blending any colour combinations together and straightening the fibres out. As you can see I have gone for a Fire tiger colour scheme here so I have a little yellow on top at the back, then chartreuse for the rest of the top and orange for the bottom.
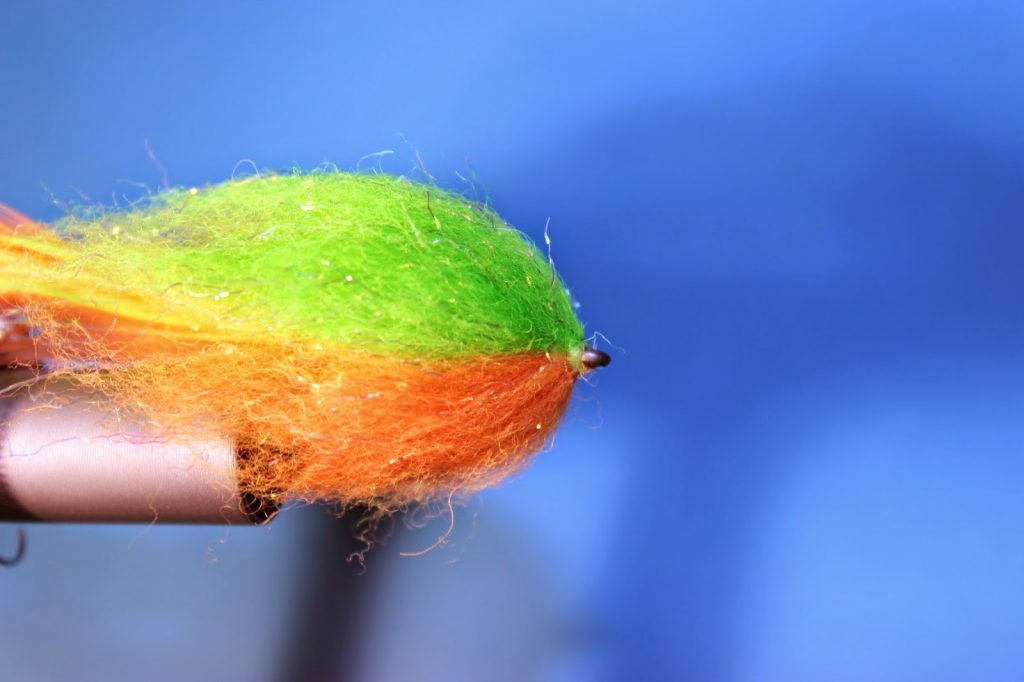
I begin by holding the fly in my hand and start lightly trimming from the head of end of the fly towards the back. Two reasons why I do it this way is it gives you a better Idea of how the fly is shaping and also it prevents snipping off too much material at once. As I trim I squeeze the fly slightly to force the fibres up a bit so the scissors can get at them, I don’t spread the fly right out. I also brush the fly now and again to encourage any long fibres out so they get trimmed.

8.
As you can see I have made a few cuts and removed some material from the top and bottom of the fly.
9.
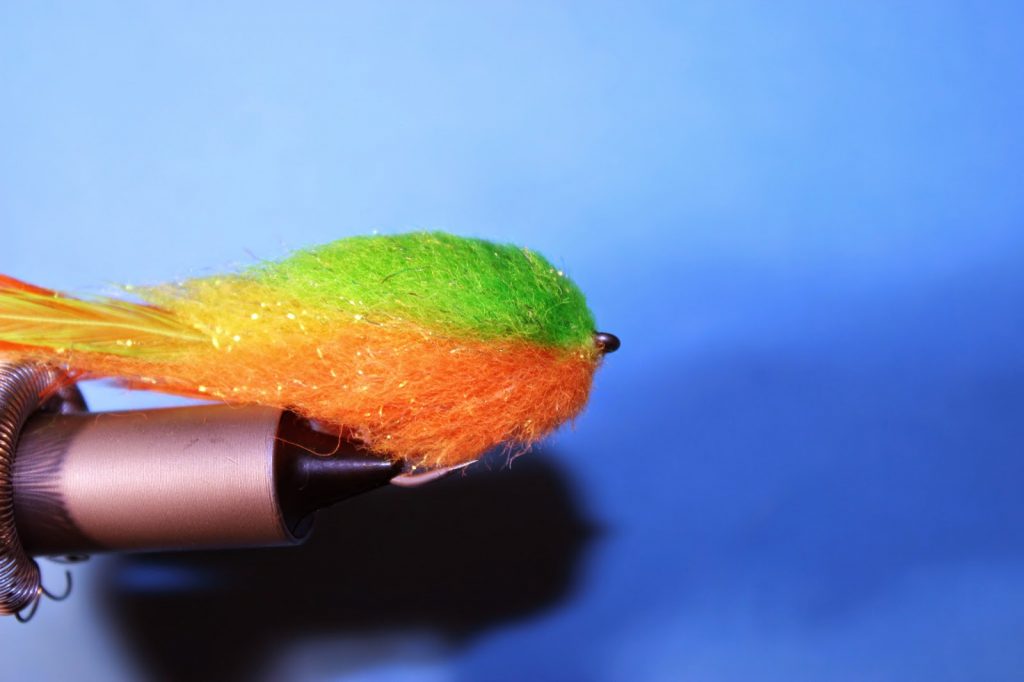
Beginning to shape the fly now, still working from front to back. Note I still leave the fibres at the rear a little longer to blend the body into the tail hackles.
10.
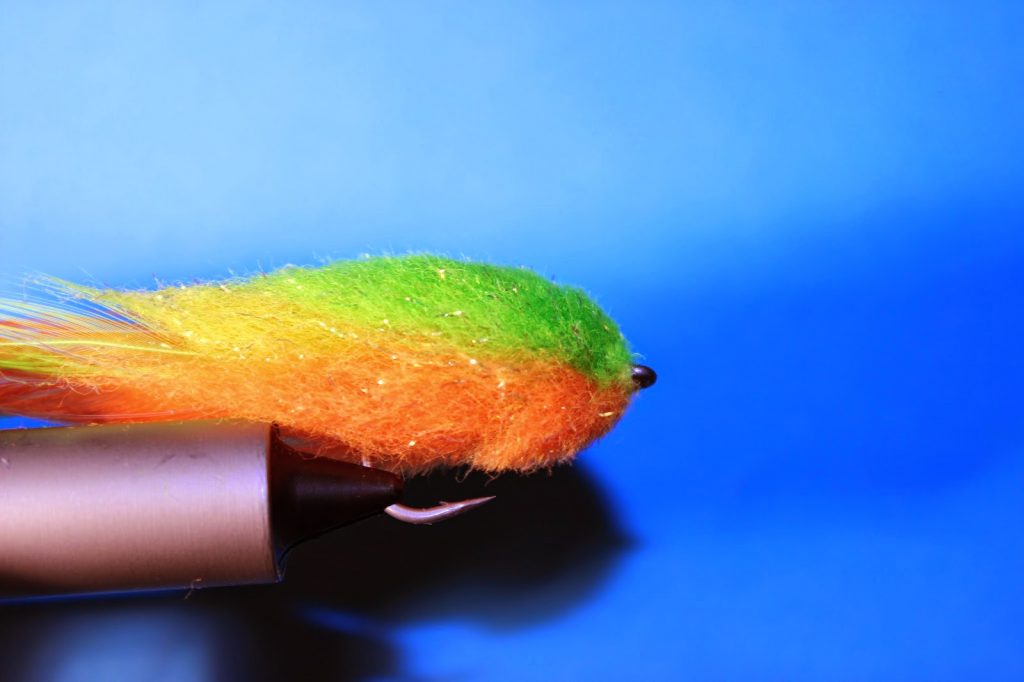
Above, almost there.

The finished article complete with eyes !
Hope that all made sense, as I said it can be tricky the first few times and there are lots of different ways to shape the fly and get different profiles so it pays to experiment and see what you prefer. Just take you time and snip off small amounts, that way there is less chance of making a mistake that can’t be rectified.